Student Attendance System Using Face Recognition
- Thakkar Vedang

- Sep 28, 2020
- 5 min read
Updated: Oct 7, 2020

Introduction :
In this blog post I’ll demonstrate how you can recognize face using python. In that I make a face Recognition Model for Student Attendance Purpose Using OpenCV (Open Source Computer Vision) And For Framework I use tkinter and Django.
Face recognition has evolved as one of the most widely used biometric in the recent times. Face recognition has stamped its uses in fields like auto door lock-unlock, criminal face detection, auto car start and it’s one of my favourites.
Description :
In this blog post I created a Student Login and Teacher Login page. Then student and teacher can login through password . In that I created a Django based Database server. Then I created a Face Detection Module, in that whenever student or teacher do login then they are train faces which are stored in our Datasets or created Datasets. After that teacher can login through password and face id , in that both are match with your Database stored image , then and then show your profile for student and for teacher can mark attendance And also we can see the student's attendance pie chart form.

What is OpenCV?
So basically, OpenCV (Open source computer vision) is an open source computer vision and Machine Learning Library for face detection. By using that it's give a common structure for the bases of computer vision Application . For the Machine interpretation product like Front face facial Recognition , Eye Detection , Hand Gesture Detection , etc.
OpenCV has more than 2,500 optimized algorithms. This algorithms can be used for to detect a Object, eye movements , facial Landmarks, moving objects in a video, etc.
import cv2
cap = cv2.VideoCapture(0);
Haar Cascade:
So let's understand this term what these Haar Cascade Classifier are. This is the machine Learning based approach where a cascade function is trained from a lot of images. it should be a negative or positive multidimensional array image. Based on the training it is used for to detect a object or any movement object or any movement in video .This cascade file will help your model classify your facial expression.
face_cas = cv2.CascadeClassifier('haarcascade_frontalface_default.xml')
cap = cv2.VideoCapture(0);
Implementation for face Detection :
For implementation these are the steps for face detection using OpenCV , the entire summary can be jotted down in just few simple steps :
Import a OpenCV library
Reading the data.
Gathering the data and store in particular dataset folder
Training the dataset.
Detecting the face (creating box around the face and mapping the result)
Recognizing the name of face which is detect by OpenCV trainer model.
Now Let's see how to store a set of images in particular dataset and Training the data.
Training Data- person1, person2, person3, .......
Where the person1 , person2,.. are contains 50 training images of a person to be recognized .
Test-data- test1.jpg,test2.jpg…..some test images.

Steps for store Data-collection :
import os
def assure_path_exists(path):
    dir = os.path.dirname(path)
    if not os.path.exists(dir):
        os.makedirs(dir)
Store a Dataset :
data_path = 'C:/Users/vedang/Desktop/Face_Recognition/dataset/'Store an images to dataset in .jpg extension file format :
cv2.imwrite("dataset/User." + str(face_id) + '.' + str(count) + ".jpg", gray[y:y + h, x:x + w])
cv2.imshow('frame', image_frame)
Now we done with the data preparation. So, For Face detection we can use a LBH classifier . Local Binary Pattern (LBP) is a simple yet very efficient texture operator which labels the pixels of an image by thresholding the neighborhood of each pixel and considers the result as a binary number. It is a very fast in process, compare to Haar cascade classifier which is quite slower then LBH classifier. You can download these xml files from here .
recognizer = cv2.face.LBPHFaceRecognizer_create();
So , now let's understand the work of face classifier. First of all the image is converted into gray scale in order to opt the value of pixel in binary format.
ret, img = cap.read();
gray = cv2.cvtColor(img, cv2.COLOR_BGR2GRAY);
faces = face_cas.detectMultiScale(gray, 1.3, 7);
Now, We now want to detect the face by drawing the rectangle around the face.
for (x, y, w, h) in faces:
    roi_gray = gray[y:y + h, x:x + w]
    cv2.rectangle(img, (x, y), (x + w, y + h), (255, 0, 0), 2);
A scrolling matrix window of size 3 x 3 is rolled over the gray image of pixels in the range (0–255).Picking up the central value of matrix as a threshold value and remaining values are converted is being converted in the 0 or 1 by setting 1 if the value of pixel is equal or greater than threshold value and 0 if the value is less than threshold value.
Here comes the final part of this blog, prediction. Once again OpenCV has made this very easy for us. Just loading the test image, using opencv’s face_recognizer. predict method with faces and labels ,calculating the accuracy of test model calling the text and rectangle method and we are done.
Wait Key and Releasing and Destroying the windows : his is a method which is used to kill the process if any key is pressed it only takes ASCII values here 13 is an ASCII value.
This is probably the most important thing to do because this will destroy all the windows which are open during the process of capturing the data and if you do not use this the camera window will not shut down and you will have to restart the system all over again and in some cases restart doesn’t even work.
if cv2.waitKey(1)==13:
        break

cap.realese()
cv2.destroyAllWindows()
At last for implementation i check the confidence of image , how much confidence i got by training image .

But here we have to create Dynamically Attendance System. For that I use Django Frame work. Django is a high-level Python Web framework that encourages rapid development. Django also provides an optional administrative create, read, update and delete interface that is generated dynamically .
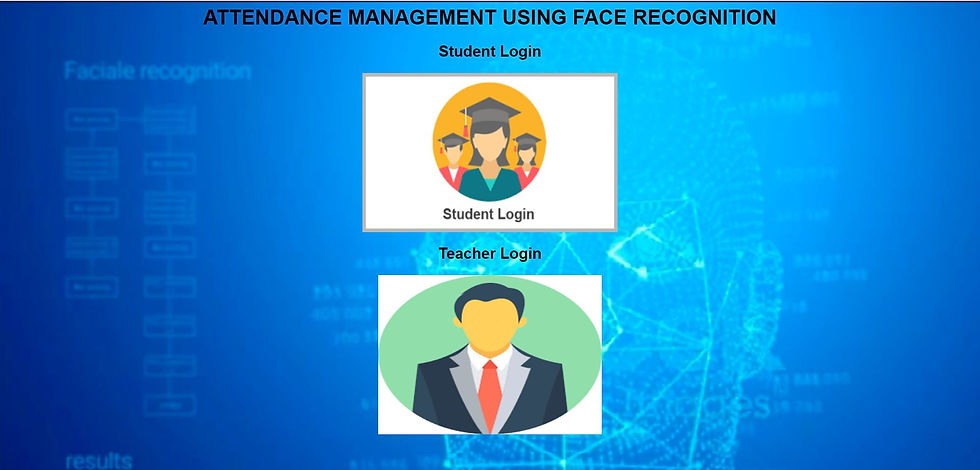
So, here is my First login page of student login and Teacher login, it's run on Django server.

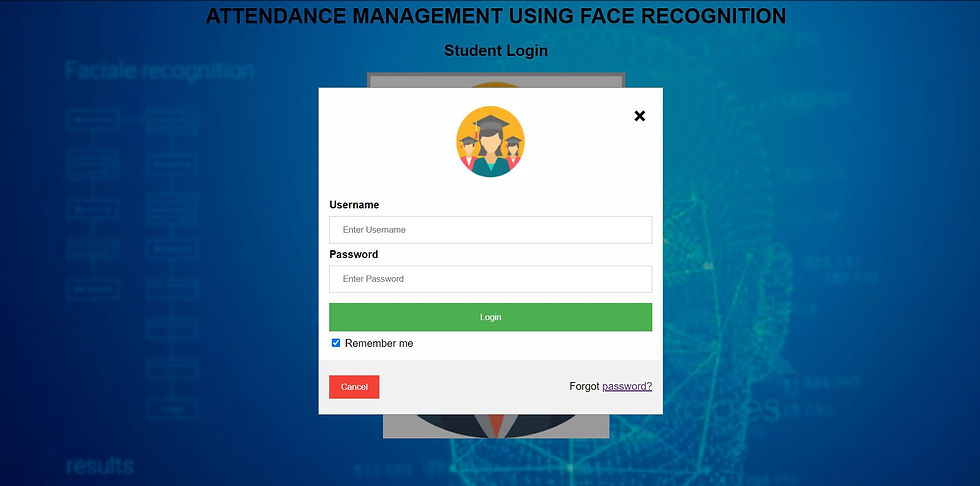
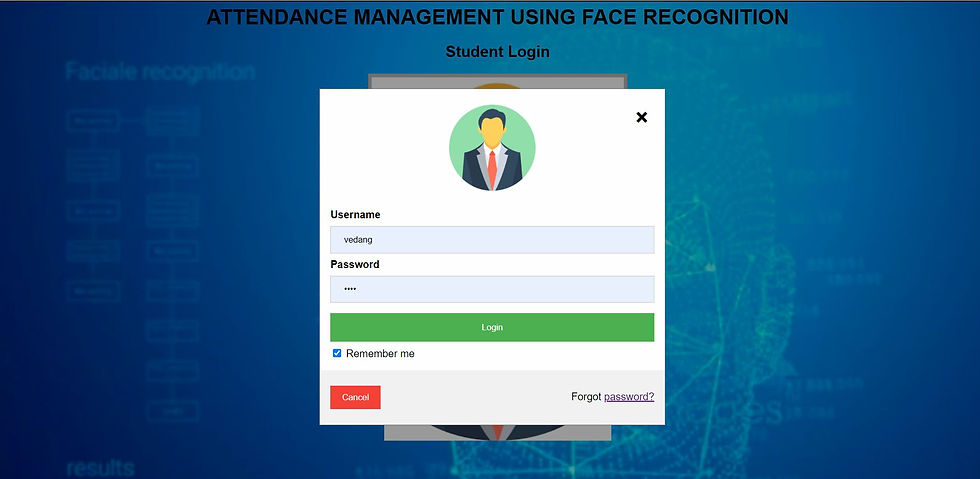
In this login page i created a two groups of student login and Teacher login. here below images is a login of student and Teacher.


As you can see the login are different so in Django Admin there is two dashboard of this login . whenever Teacher do login with id and password , after that when click on login button , there is a teacher image is linked with teacher's id and password.
This image can be trained by OpenCV module, the trained image and password must be match , then and then person can login in his/her dashboard. For New Student, Teacher can set the ID no, store the dataset of student and mark a attendance. Whenever teacher can mark a Attendance, automatically image can recognize and mark as a present. For Student can see his Attendance Report or Bar chart of Attendance.
For New student,


Comments