Multiple Student Attendance Using Histogram of Oriented Gradients using Dlib and Django Framework
- Thakkar Vedang

- Mar 19, 2021
- 5 min read
In this module, we’ll see how to create and launch a face detection algorithm in Python using OpenCV and Dlib. will go through the most basic implementations of face detection including Cascade Classifiers, HOG windows and Deep Learning CNNs.
We’ll cover face detection using :
1. Haar Cascade Classifiers using OpenCV
2. Deep Learning based Face Detector in OpenCV
3. Histogram of Oriented Gradients using Dlib
4. Convolutional Neural Networks using Dlib
1. Cascade Classifiers :
Cascade classifier, or namely cascade of boosted classifiers working with haar-like features, is a special case of ensemble learning, called boosting. Cascade classifiers are trained on a few hundred sample images of image that contain the object we want to detect, and other images that do not contain those images.
How can we detect if a face is there or not ? There is an algorithm, called Viola–Jones object detection framework, that includes all the steps required for live face detection : 1. Haar Feature Selection, features derived from Haar wavelets
2. Create integral image
3. Adaboost Training
4. Cascading Classifiers
Pros
1. Works almost real-time on CPU
2. Simple Architecture
3. Detects faces at different scales
Cons
1. The major drawback of this method is that it gives a lot of False predictions.
2. Doesn’t work on non-frontal images.
3. Doesn’t work under occlusion

CNN(Convolutional Neural Networks Advantages:
CNN based face detection is so accurate, it can find odd faces It works on CPU but must faster on GPU Very easy to use Dis-Advantages: Works slow on CPU Doesn’t detect small faces (you can notice that CNN missed small faces from the output)
Histogram of Oriented Gradients (HOG) in Dlib :
One of the most popular implement for face detection is offered by Dlib and uses a concept called Histogram of Oriented Gradients (HOG).original paper by Dalal and Triggs - https://lear.inrialpes.fr/people/triggs/pubs/Dalalcvpr05.pdf
The model is built out of 5 HOG filters – front looking, left looking, right looking, front looking but rotated left, and a front looking but rotated right.
The idea behind HOG is to extract features into a vector, and feed it into a classification algorithm like a Support Vector Machine for example that will assess whether a face (or any object you train it to recognize actually) is present in a region or not.
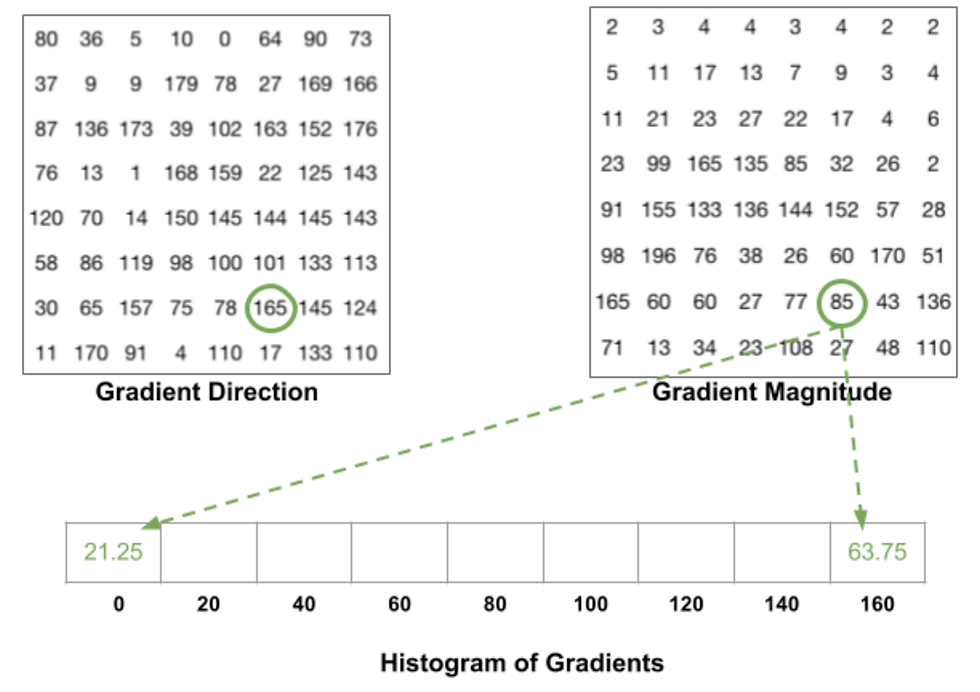
The features extracted are the distribution (histograms) of directions of gradients (oriented gradients) of the image. Gradients are typically large around edges and corners and allow us to detect those regions.

Computing the gradient images
The gradient of an image typically removes non-essential information.
Compute type HOG
The image is then divided into 8x8 cells to offer a compact representation and make our HOG more robust to noise. Then, we compute a HOG for each of those cells.
Block normalization
Finally, a 16x16 block can be applied in order to normalize the image and make it invariant to lighting for example. We have our feature vector, on which we can train a SVM(support vector machine) classifier.
Pros
1. Works very well for frontal and slightly non-frontal faces
2. Light-weight model as compared to CNN.
3. Works under small occlusion
4. Basically, this method works under most cases except a few as discussed below.
Cons
1. The major drawback is that it does not detect small faces as it is trained for minimum face size of 80×80. Thus, you need to make sure that the face size should be more than that in your application. You can however, train your own face detector for smaller sized faces.
2. The bounding box often excludes part of forehead and even part of chin sometimes. 3. Does not work very well under substantial occlusion
4. Does not work for side face and extreme non-frontal faces, like looking down or up.
5. Really slow for real time detections
DNN(Deep Neural Network)
The latest OpenCV includes a Deep Neural Network (DNN) module, which comes with a nice pre-trained face detection convolutional neural network (CNN). The new model enhances the face detection performance compared to the traditional models, such as Haar.
When using OpenCV’s deep neural network module with Caffe models, you’ll need two sets of files:
The .prototxt file(s) which define the model architecture (i.e., the layers themselves) The .caffemodel file which contains the weights for the actual layers Both files are required when using models trained using Caffe for deep learning.
OpenCV’s deep learning face detector is based on the Single Shot Detector (SSD) framework with a ResNet base network (unlike other OpenCV SSDs that you may have seen which typically use MobileNet as the base network).
Frame rate
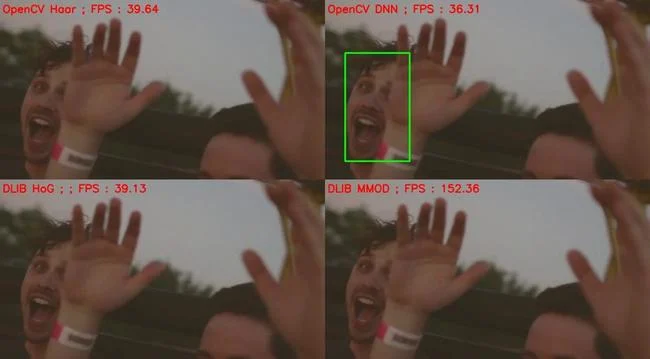
Haar — 9.25 fps Dlib — 5.41 fps CNN — 7.92 fps DNN module of OpenCV — 12.95 fps
DNN

Conclusion
Haar
The Haar Cascade classifier gave the worst results in a majority of the test along with a lot of false positives.
Dlib and CNN
It had very similar results with a slight edge to CNN, but Dlib can’t identify very small faces. Also if the size of images is very extreme and there is a surety that lighting will be good along with minimum occlusion and mainly front-facing faces CNN might give the best results as seen when we were comparing the images.
DNN
For general computer vision problems, OpenCV’s Caffe model of the DNN module is the best. It works well with occlusion, quick head movements, and can identify side faces as well. Moreover, it also gave the quickest fps among all.
Algorithm
There are various algorithms used for facial recognition. Some of them are as follows: Eigen faces
Fisher faces
Local binary patterns histograms
EIGEN FACES
This method is a statistical plan. The characteristic which influences the images is derived by this algorithm. The whole recognition method will depend on the training database that will be provided. The images from two different classes are not treated individually.
FISHER FACES
Fisher faces algorithm also follows a progressive approach just like the Eigen faces. This method is a alteration of Eigen faces so it uses the same principal Components Analysis. The major conversion is that the fisher faces considers the classes.
As mentioned previously, the Eigen faces does not differentiate between the two pictures from two differed classes while training. The total average affects each picture. A Fisher face employs Linear Discriminant Analysis for distinguishing between pictures from a different class.
LOCAL BINARY PATTERNS HISTOGRAMS
This method needs the gray scale pictures for dealing with the training part. This algorithm in comparison to other algorithms is not a holistic approach.
But here we have to create Dynamically Attendance System. For that I use Django Frame work. Django is a high-level Python Web framework that encourages rapid development. Django also provides an optional administrative create, read, update and delete interface that is generated dynamically .
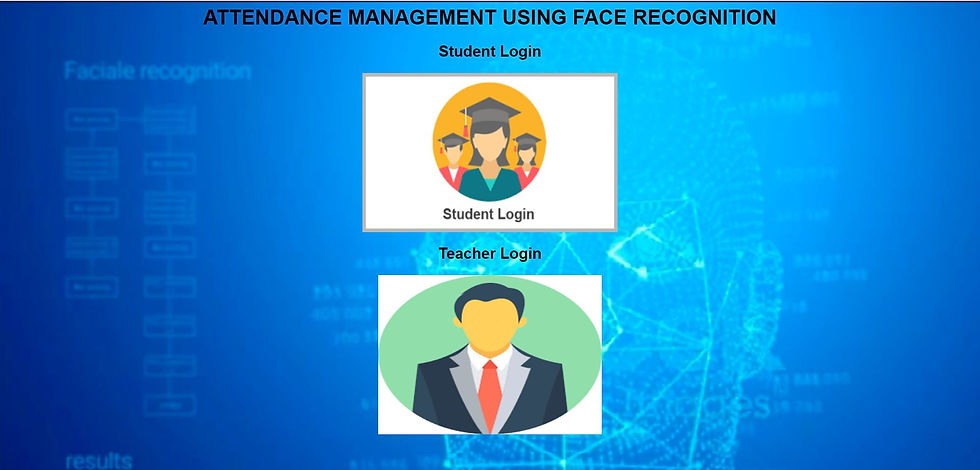
So, here is my First login page of student login and Teacher login, it's run on Django server.
In this login page i created a two groups of student login and Teacher login. here below images is a login of student and Teacher.
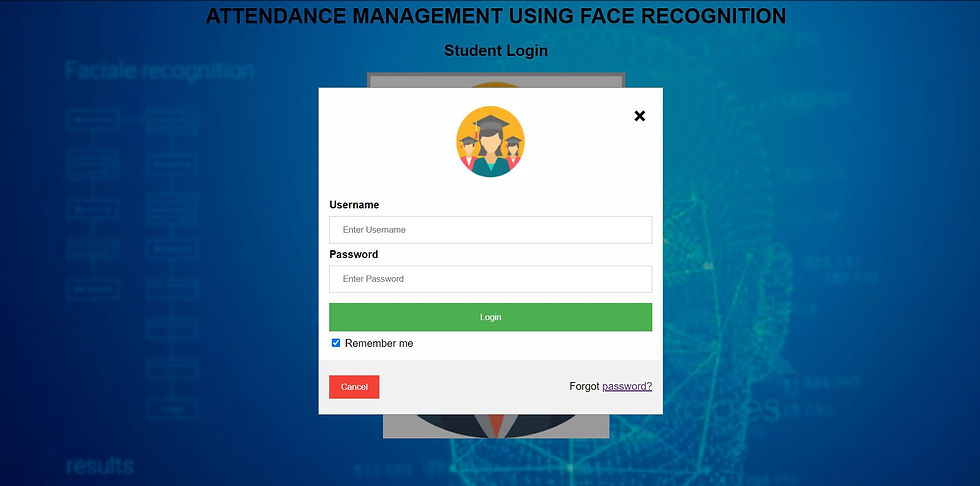
As you can see the login are different so in Django Admin there is two dashboard of this login . whenever Teacher do login with id and password , after that when click on login button , there is a teacher image is linked with teacher's id and password.

This image can be trained by OpenCV module, the trained image and password must be match , then and then person can login in his/her dashboard. For New Student, Teacher can set the ID no, store the dataset of student and mark a attendance. Whenever teacher can mark a Attendance, automatically image can recognize and mark as a present. For Student can see his Attendance Report or Bar chart of Attendance.


Comments